Xray Integration
This document explains how to set up and use Xray (Jira) integration in Katalon True.
You can enable Xray on a Jira-connected project, push test execution results to Xray, and see the linked Xray Test Execution on your test run details.
Xray integration in Katalon True rides on your existing Jira connection and is rolled out per organization. Display of the linked Xray Test Execution on test run details is controlled by an organization setting — if you do not see it, contact your account admin or Katalon to enable it.
Find your starting point:
- Setting up Xray for the first time? -> Start from Step 1.
- Jira is connected and you want to enable Xray on a project? -> Skip to Step 2.
- Xray is enabled and you want to push results? -> Skip to Push test execution results to Xray.
Step 1: Connect Jira
Xray integration is configured as part of your Jira integration. Set up the Jira connection first.
Follow Jira integration to connect Jira at the account level and link it to your project, then return here. Both Jira Cloud and Jira Data Center / Server are supported as Jira connection types.
Step 2: Enable Xray on the project-level
- You must have the Project Admin role to configure it on a project.
Xray is enabled inside the project-level Jira integration configuration.
- Navigate to your Project Settings > Integrations.
- Add a new configuration for your linked Jira connection.
- Select the Jira project configured with Xray and available board.
- Scroll down to the Xray setup section, enable Xray and enter your Xray Client ID.
- Use the issue-type dropdowns to map Xray test cases, test plans, and test executions to the corresponding Jira issue types, then save.
Choose the Xray Test Execution issue type
For Xray Test Execution issue type, select the Jira issue type configured for your Xray executions. Choose the corresponding issue type for the workflow you need:
- Test Execution — each push creates a new top-level Xray Test Execution.
- Sub Test Execution — each push lands inside a Sub Test Execution under a parent user story. See Push into a Sub Test Execution.
The dropdown lists issue types from the mapped Jira project, so the available names may vary. To use Sub Test Execution, make sure the corresponding sub-task issue type is configured in your Jira project.
Changing the mapping does not alter executions that were already pushed or their existing links.
The Xray setup section appears only for eligible Jira integrations. It is not shown for other integration types, such as Jira DC or Azure DevOps.
If the Xray settings are disabled, another Jira integration owns the project's ALM bridge. Open that Jira integration and configure Xray there.
Push and view test execution results in Xray
Once Xray is enabled, the Push to Xray action is available on your executions. Click the button send execution results to a Xray Test Execution in Jira.
You can also configure Xray behavior on scheduled runs, including the Xray import report type, from the schedule configuration.
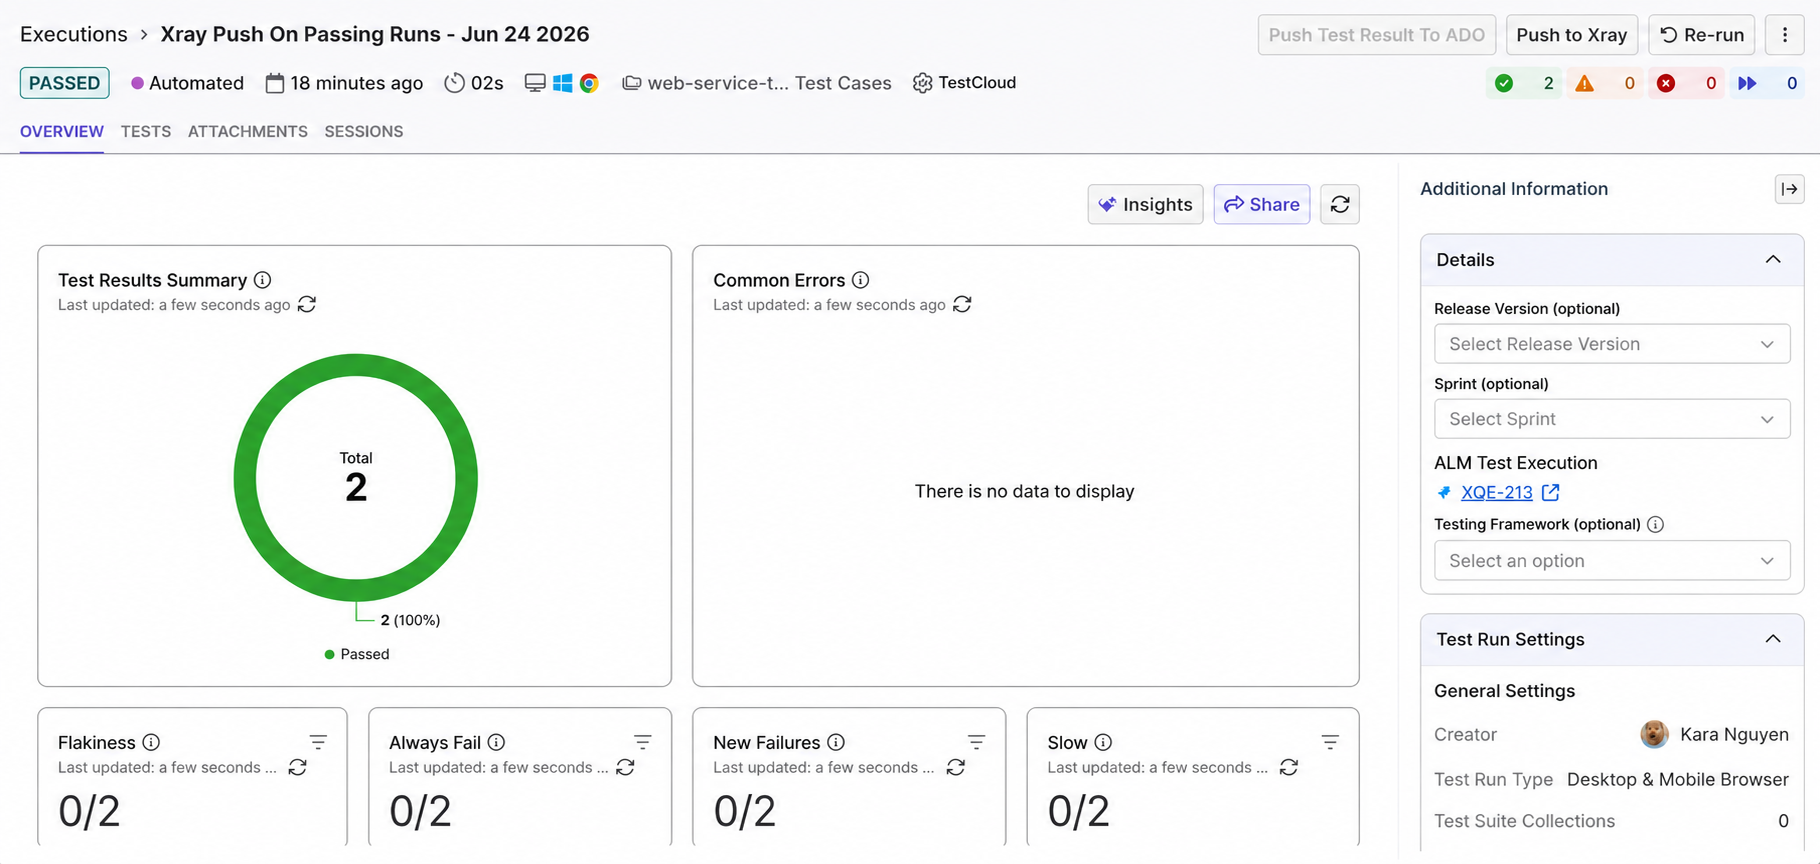
After results are pushed, navigate to Additional Information > Details and click the linked issue under ALM Test Execution to open the test run result in Jira.
Push into a Sub Test Execution
To push results under a Jira parent story, configure the project's Xray Test Execution issue type mapping for Sub Test Execution.
- Open the test run and click Push to Xray.
- Select the Xray integration and the Parent ticket.
- Complete any other applicable fields, then click Push.
Katalon pushes the results to a Sub Test Execution under the selected parent ticket.
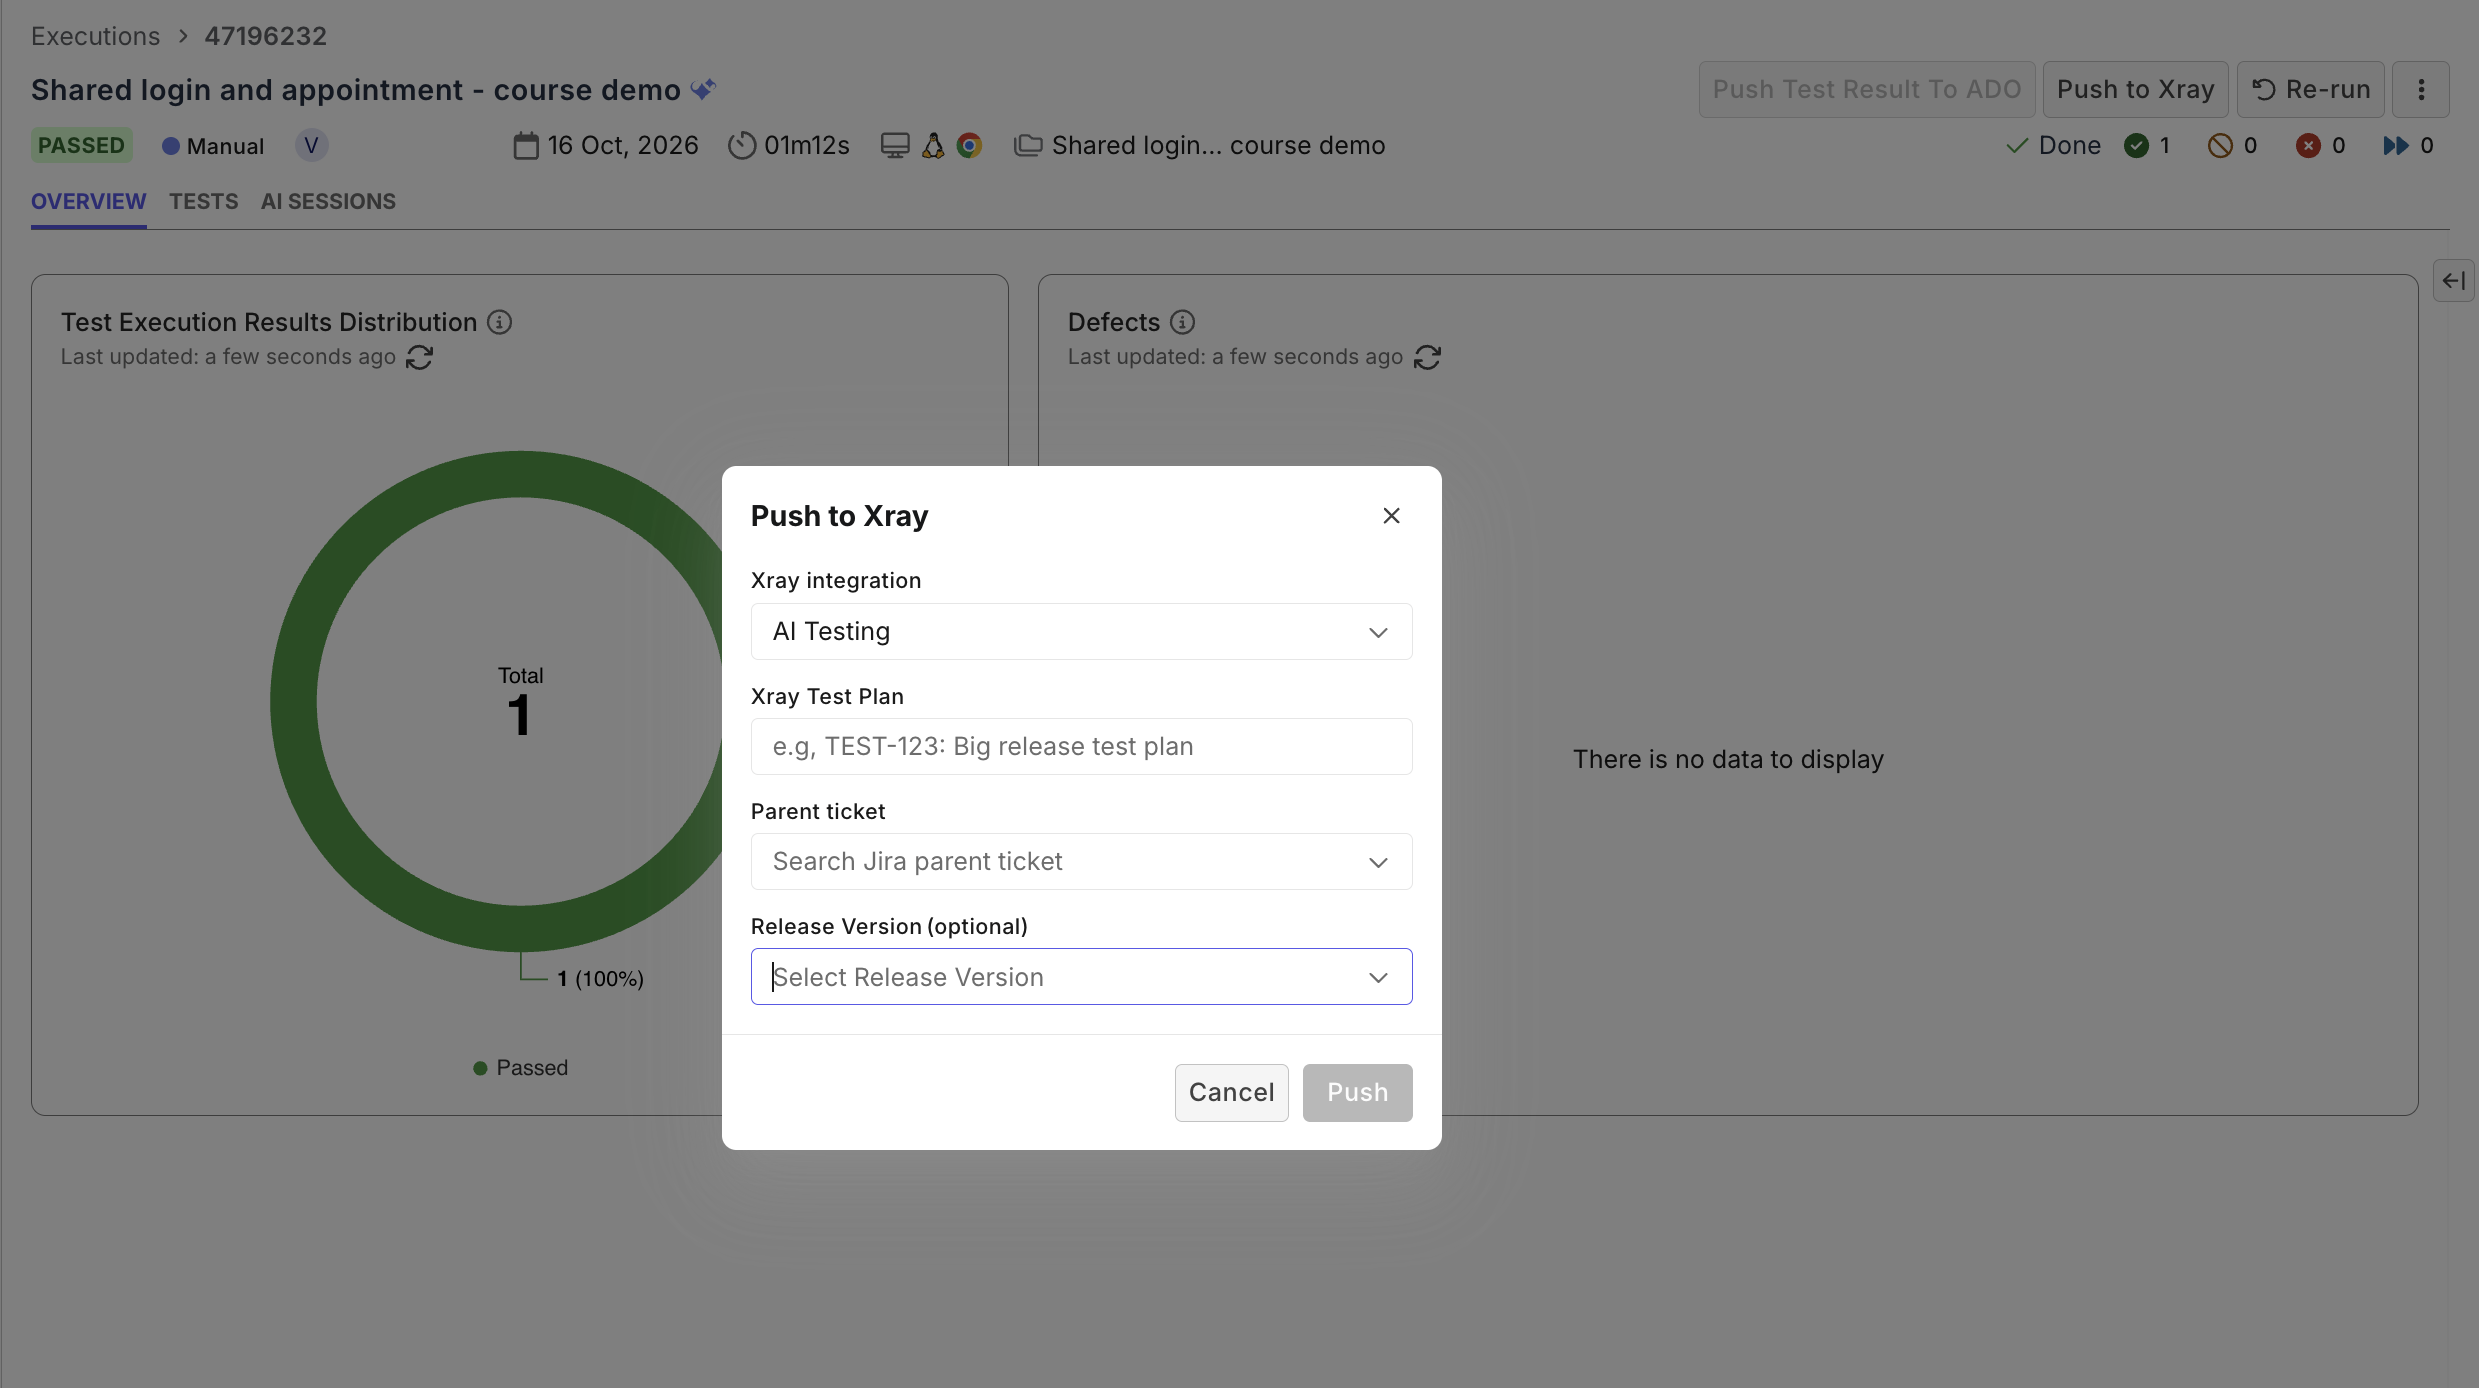
Only results for test cases linked to Xray tests are pushed. Each push uses a single parent ticket, even if the run's test cases link to more than one story.