Quick guide for testers
This guide shows the basic steps of automated testing in Katalon Studio and introduces Katalon TestOps and Katalon Runtime Engine.
Requirements
- You have a Katalon account. You can create an account.
- You have downloaded and activated Katalon Studio. See Katalon Studio installation overview.
Create your first test project
To create your first test project in Katalon Studio:
-
From the main menu, go to File > New > Project.
-
In the New Project dialog, fill in the project details:
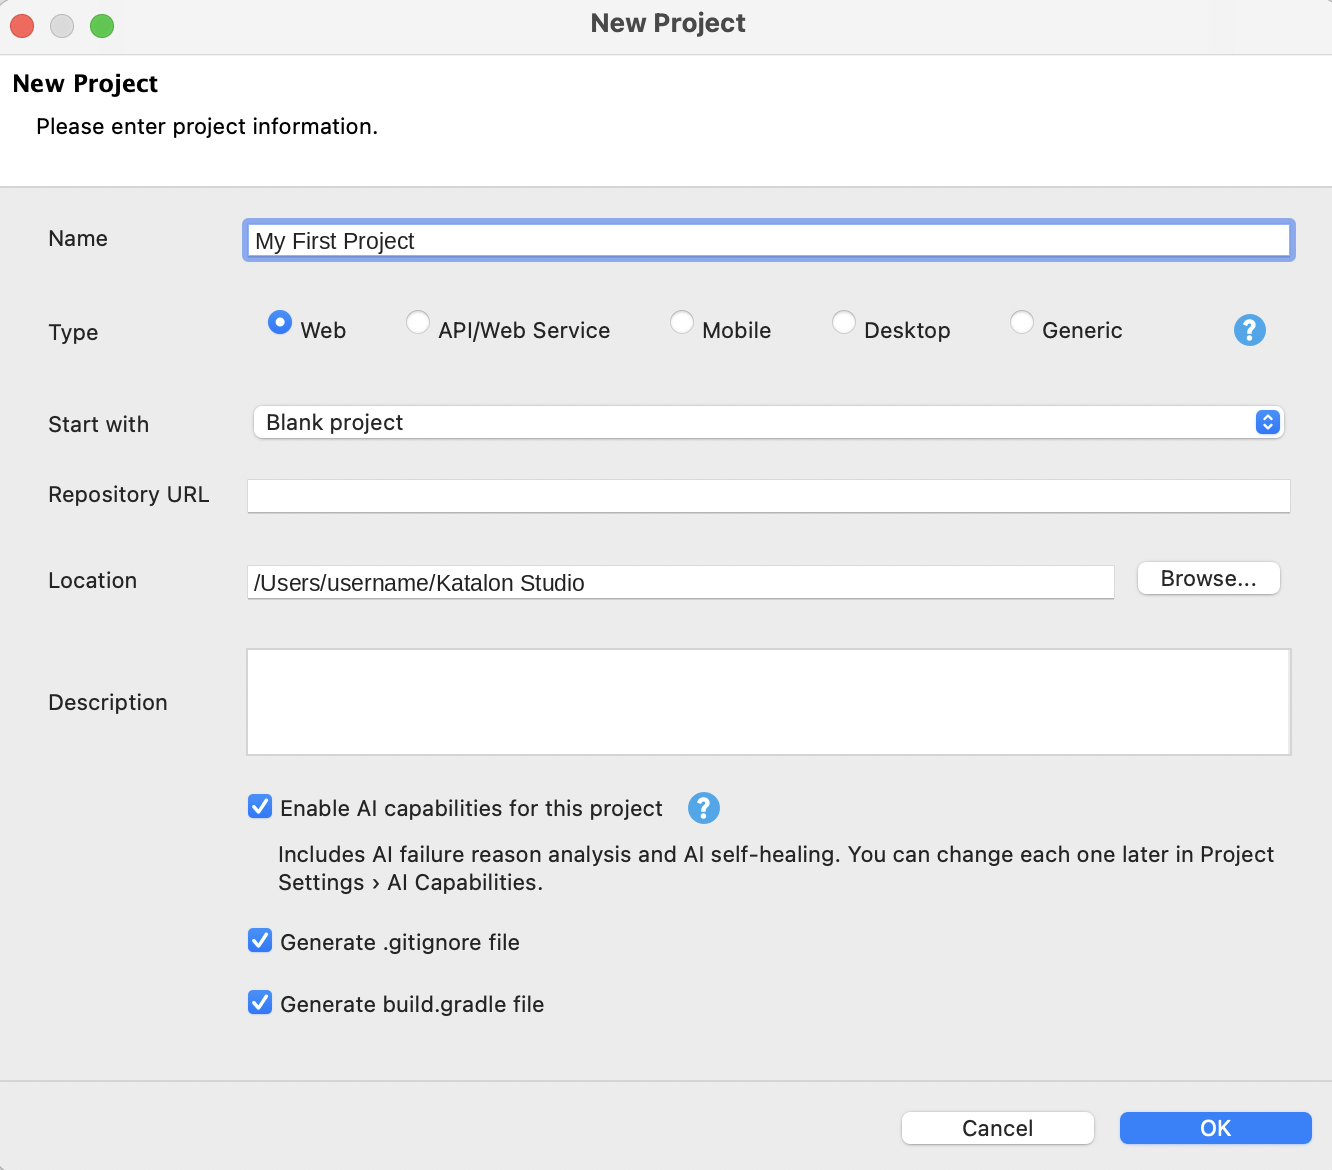
- Name: Enter a name for your project.
- Type: Choose the type that matches what you test. For this guide, choose Web.
- Start with: Choose Blank project, or choose a sample project to explore ready-made tests. A sample project fills in its Repository URL automatically.
- Location: Choose a folder where you have read and write permission.
- Description (optional): Describe what the project is for.
- Enable AI capabilities for this project: Keep this selected to turn on AI failure reason analysis and AI self-healing. You can change each one later in Project > Settings > AI Capabilities.
- Generate .gitignore file and Generate build.gradle file: Available for blank projects. Keep them selected if you plan to store the project in Git or build it with Gradle.
-
Click OK to create your project.
Connect your project to Katalon TestOps
After you create the project, you might see the Connect to Katalon TestOps dialog.
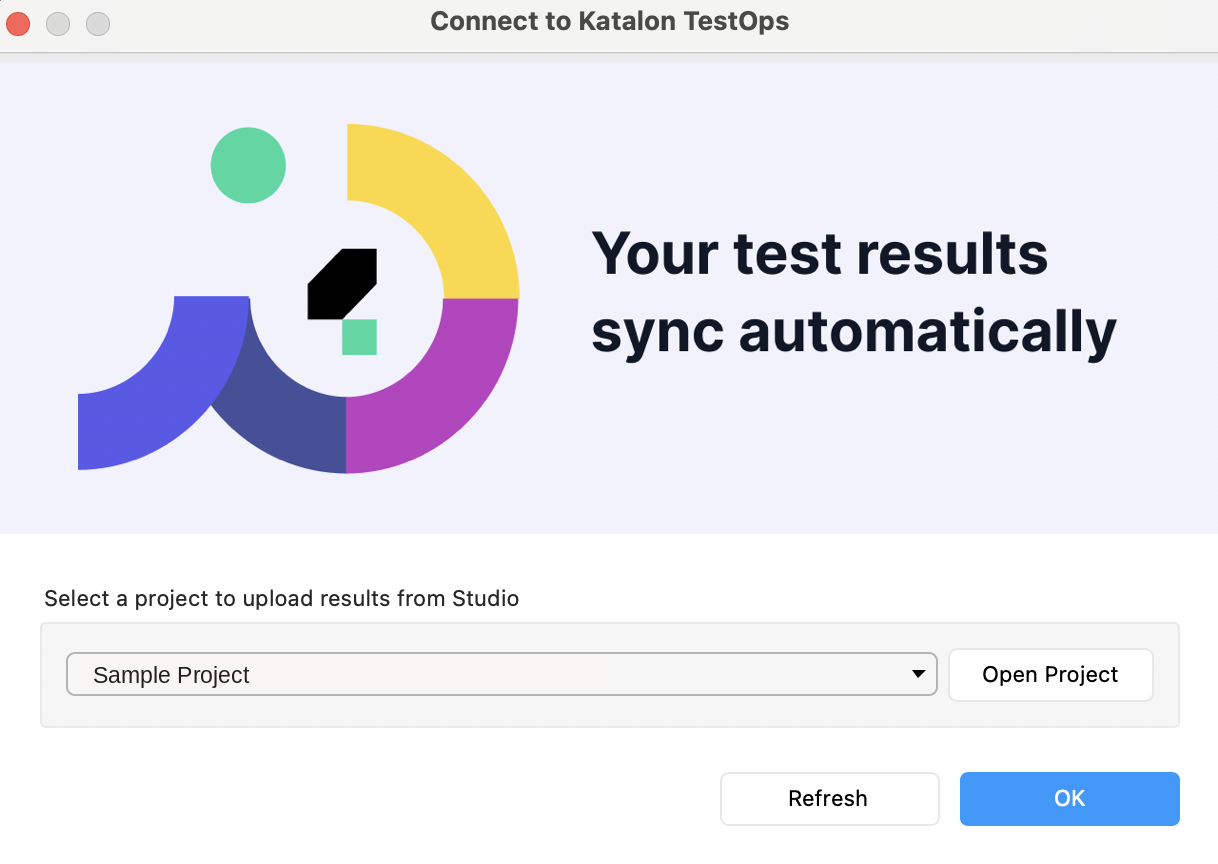
When you connect, Katalon Studio uploads your test suite results to Katalon TestOps automatically, so you don't have to share reports by hand. In TestOps, you and your team can:
- See every test run in one place, with logs, screenshots, and videos.
- Track pass rates and spot flaky tests across runs.
- Link results to requirements and defects.
- Schedule runs and run tests on cloud environments with Katalon TestCloud.
To connect:
- Choose a TestOps project from the dropdown menu. If you don't see your project, click Refresh.
- Optional: Click Open Project to view the project in Katalon TestOps.
- Click OK.
After you connect, the Start Page shows a Platform section with a quick look at your team's project: executions, execution time, and test results for the last 7 days, plus the latest runs. Use Go to Platform, View All, or Schedule Test to open the full dashboard in Katalon TestOps. To open the Start Page, go to Help > Start Page.
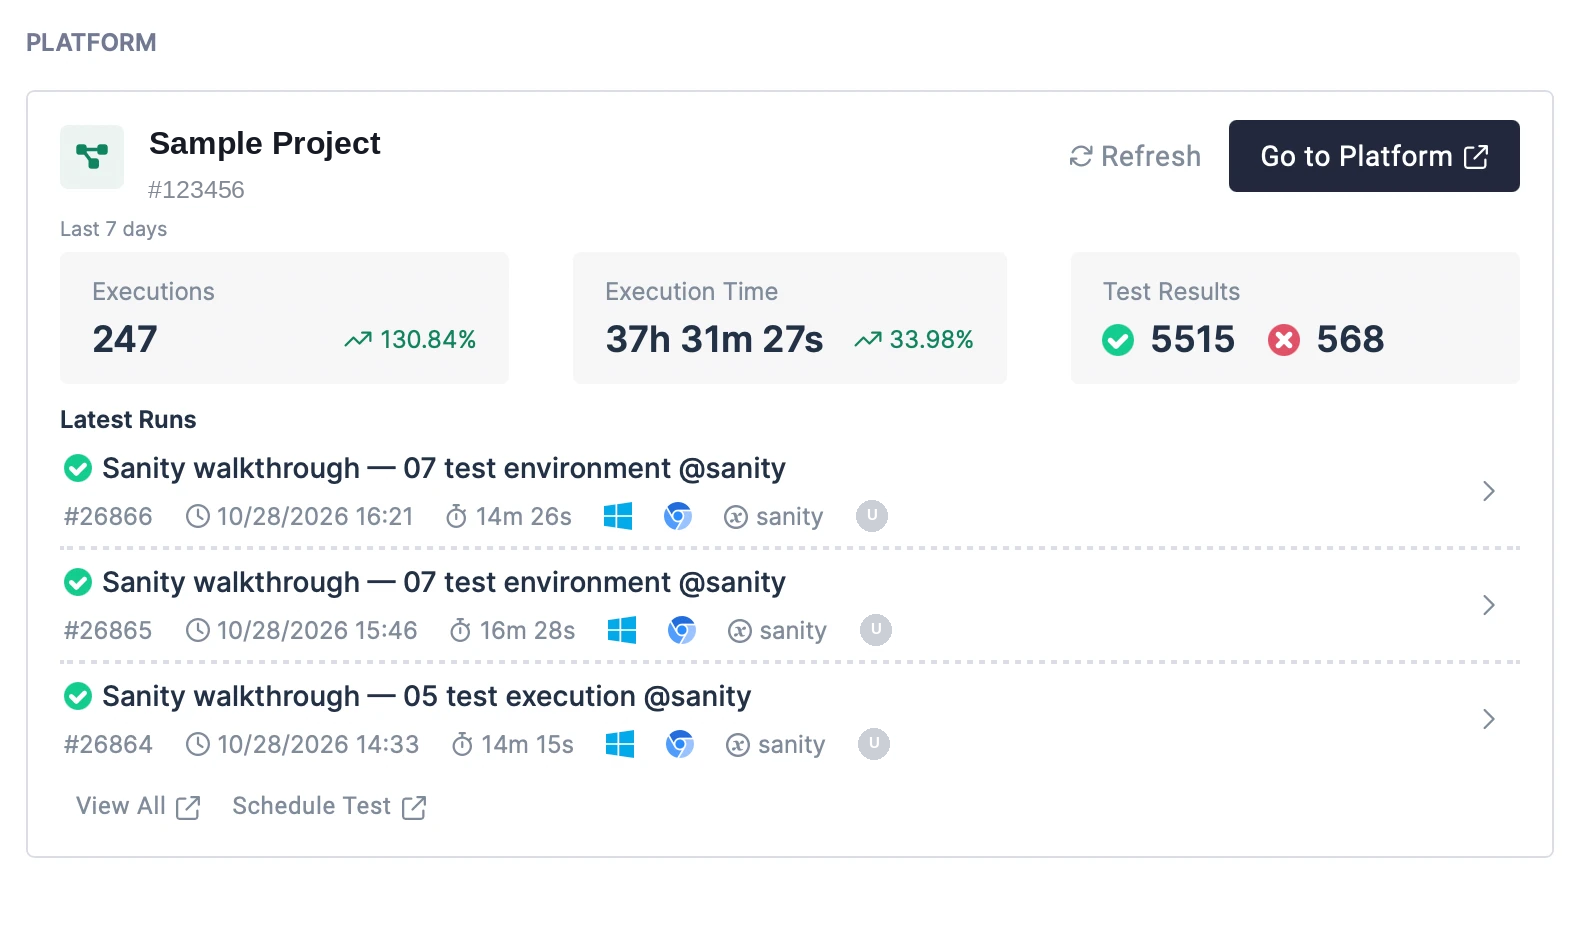
You can change the project or turn off uploads later in Project > Settings > Katalon TestOps Integration. See Integrate Katalon TestOps and TestCloud with Katalon Studio.
Write your first test case
This tutorial shows how to create a web test case with the Web Recorder in Katalon Studio. Perform actions on the website as a user would, and the recorder captures them as test steps.
For other project types, see the guides for mobile, desktop, API, and BDD testing.
The application under test is the CURA Healthcare Service demo. You can also clone the Healthcare sample project.
-
From the main toolbar, click the Record Web icon (the globe with a red dot).

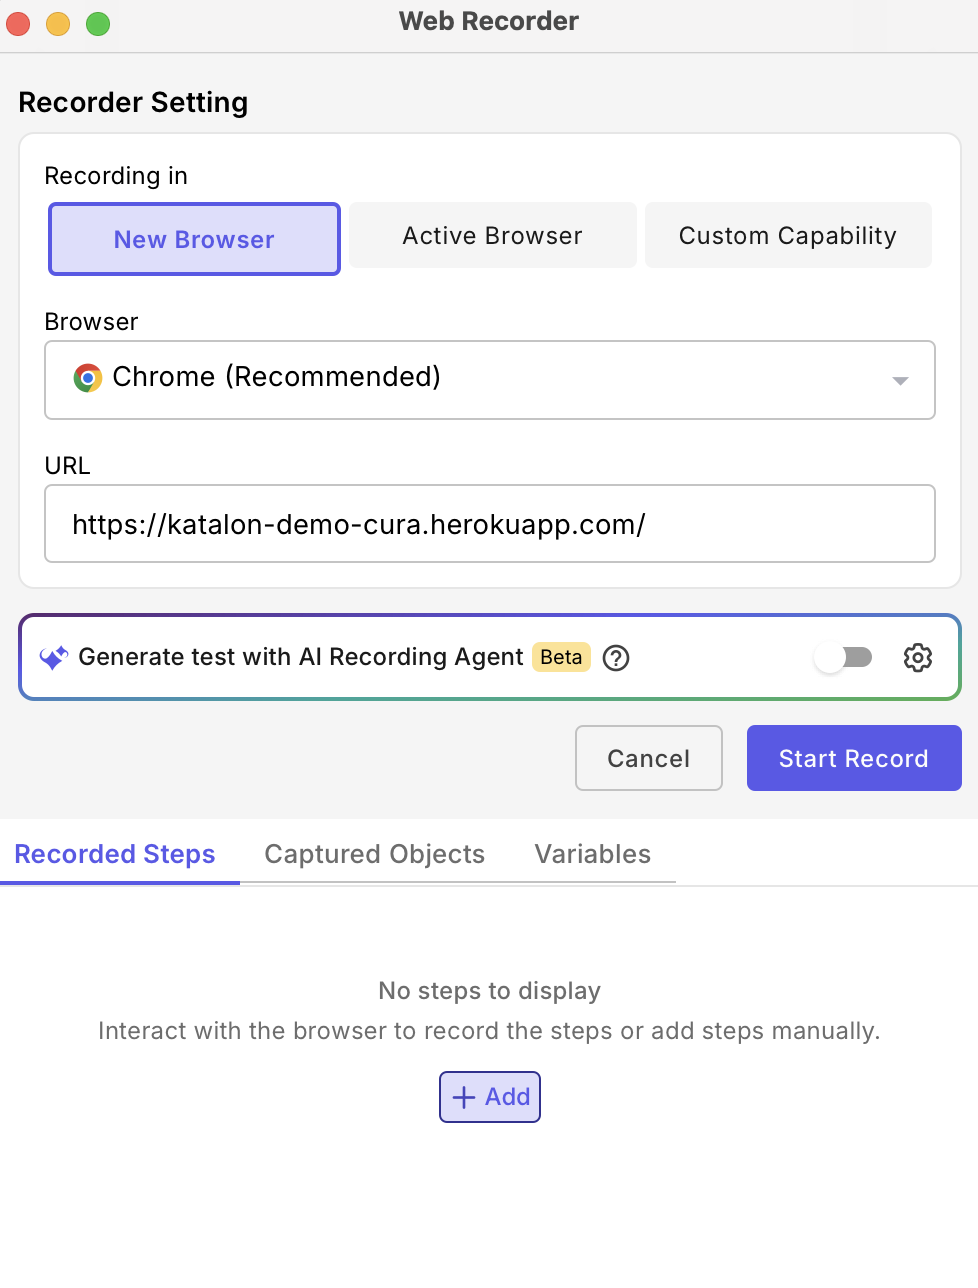
The Web Recorder dialog opens.
-
Under Recorder Setting, set up the recording:
- Recording in: Select New Browser.
- Browser: Select Chrome (Recommended).
- URL: Enter the demo website URL:
https://katalon-demo-cura.herokuapp.com/. - Leave Generate test with AI Recording Agent turned off for this guide.
-
Click Start Record. Wait until the browser opens and the page loads.
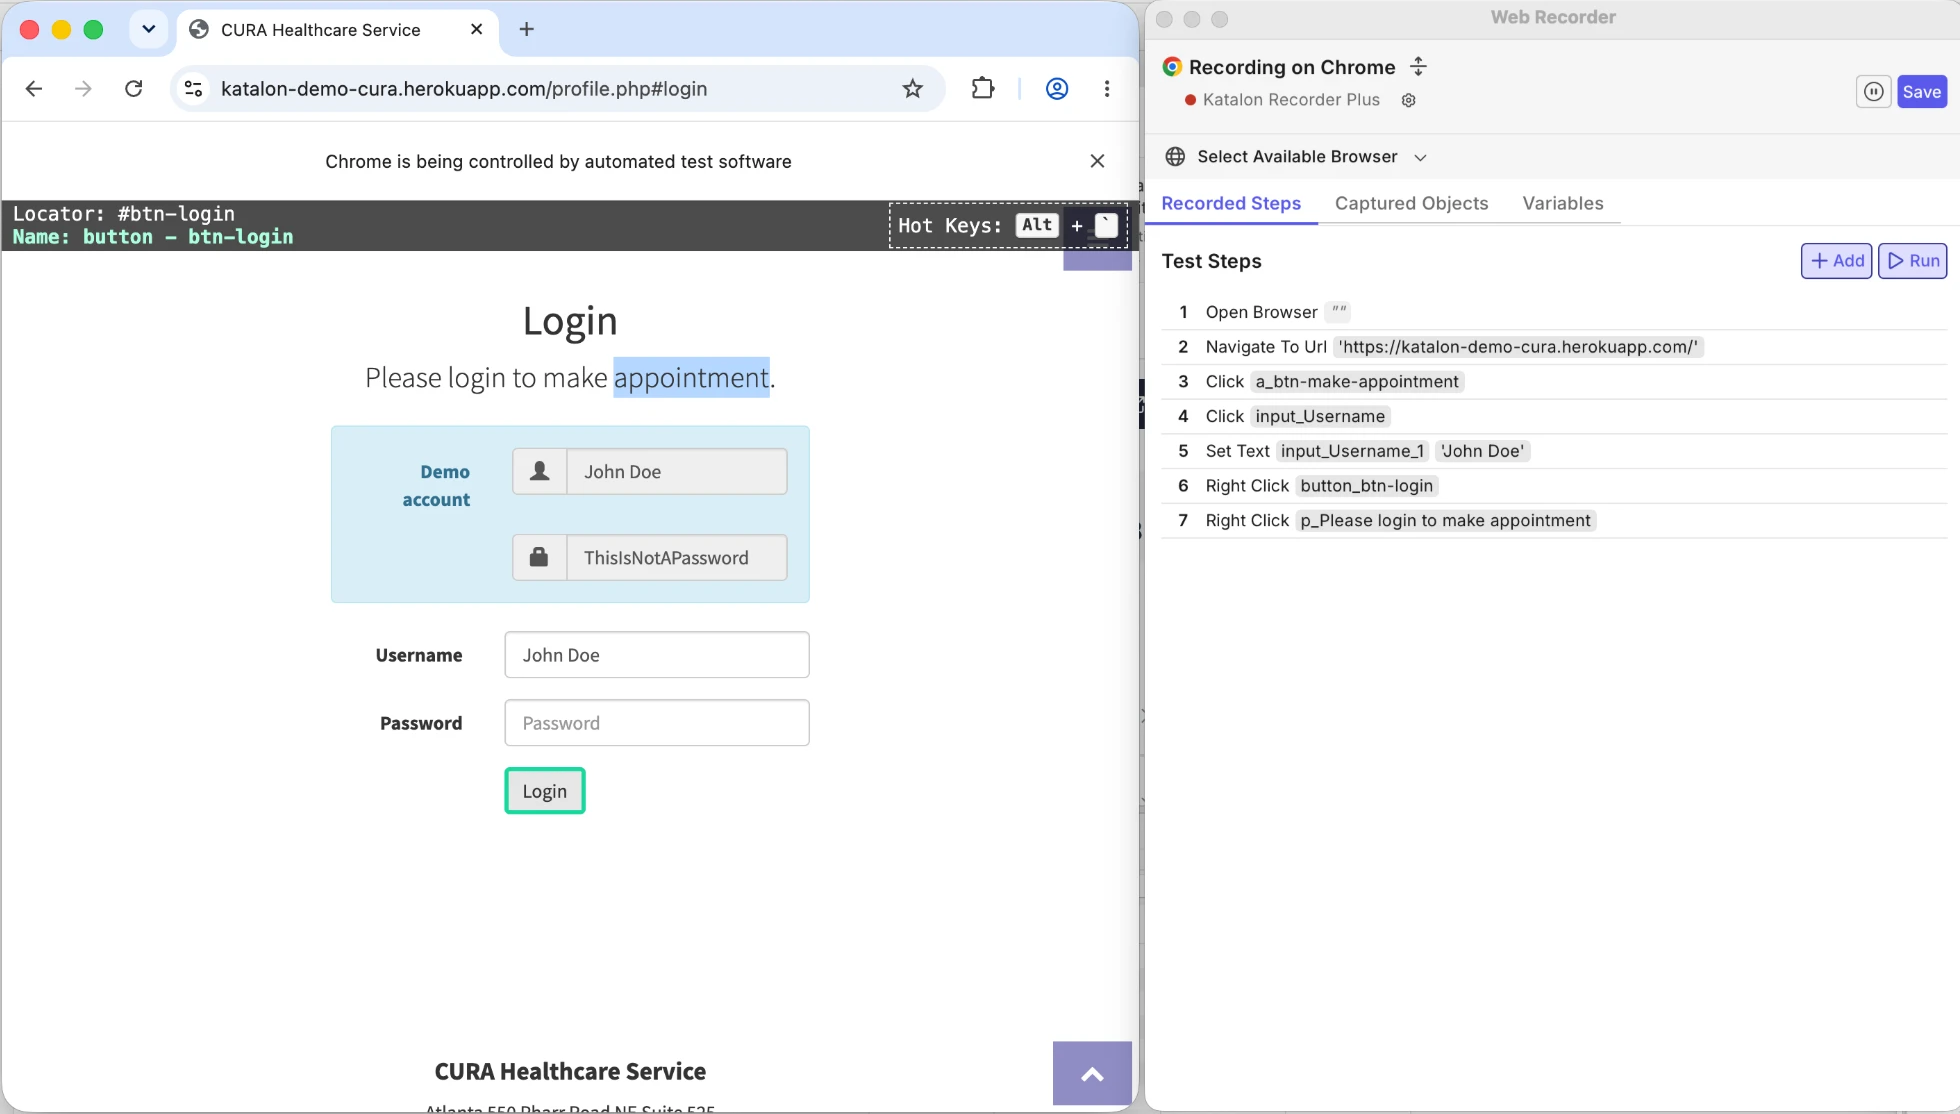
When you hover over an element, Katalon Studio highlights it and shows its Locator and Name at the top of the page.
-
Record the test as planned:
-
Click Make Appointment.
-
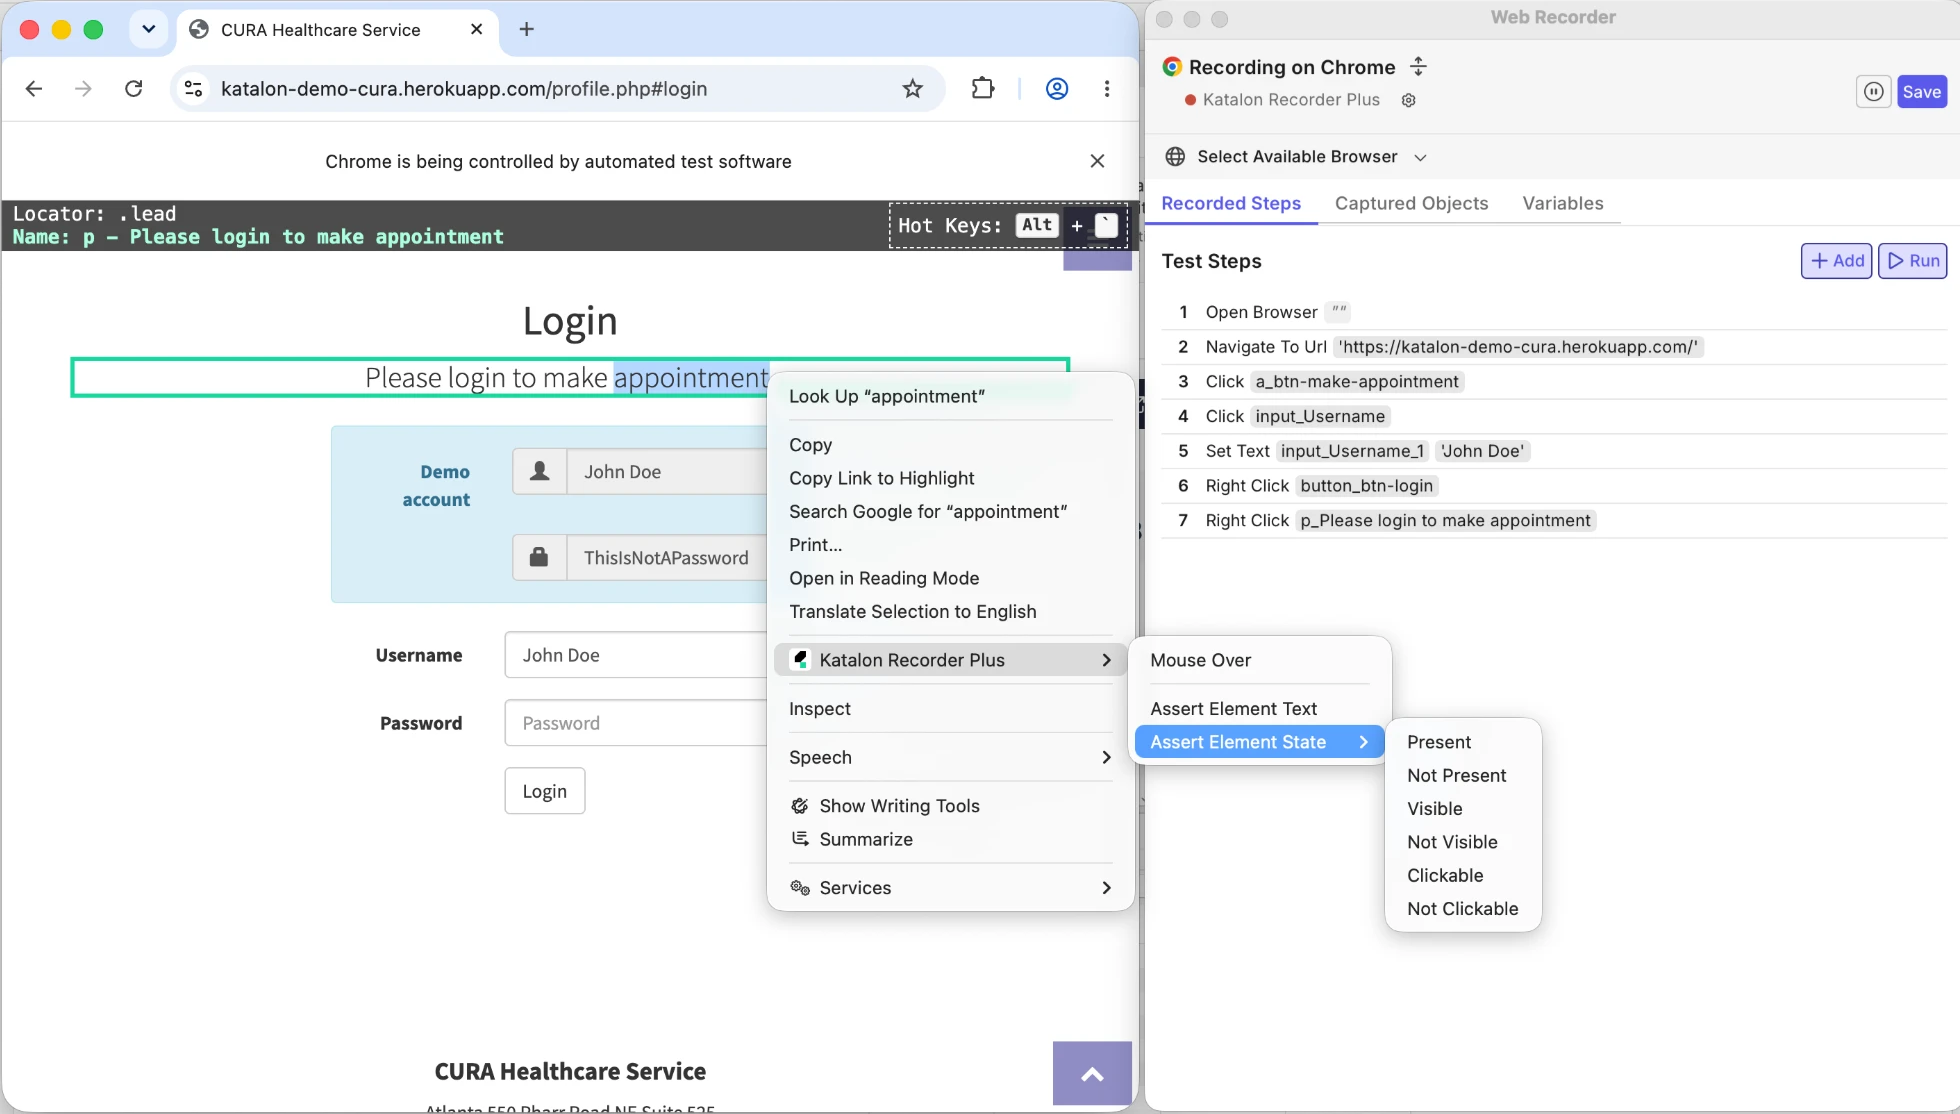
To verify that the login page appears, right-click the Please login to make appointment text, then select Katalon Recorder Plus > Assert Element State > Present.
-
Fill in the demo username and password, then click Login.
-
-
Review your test in the Web Recorder dialog:
-
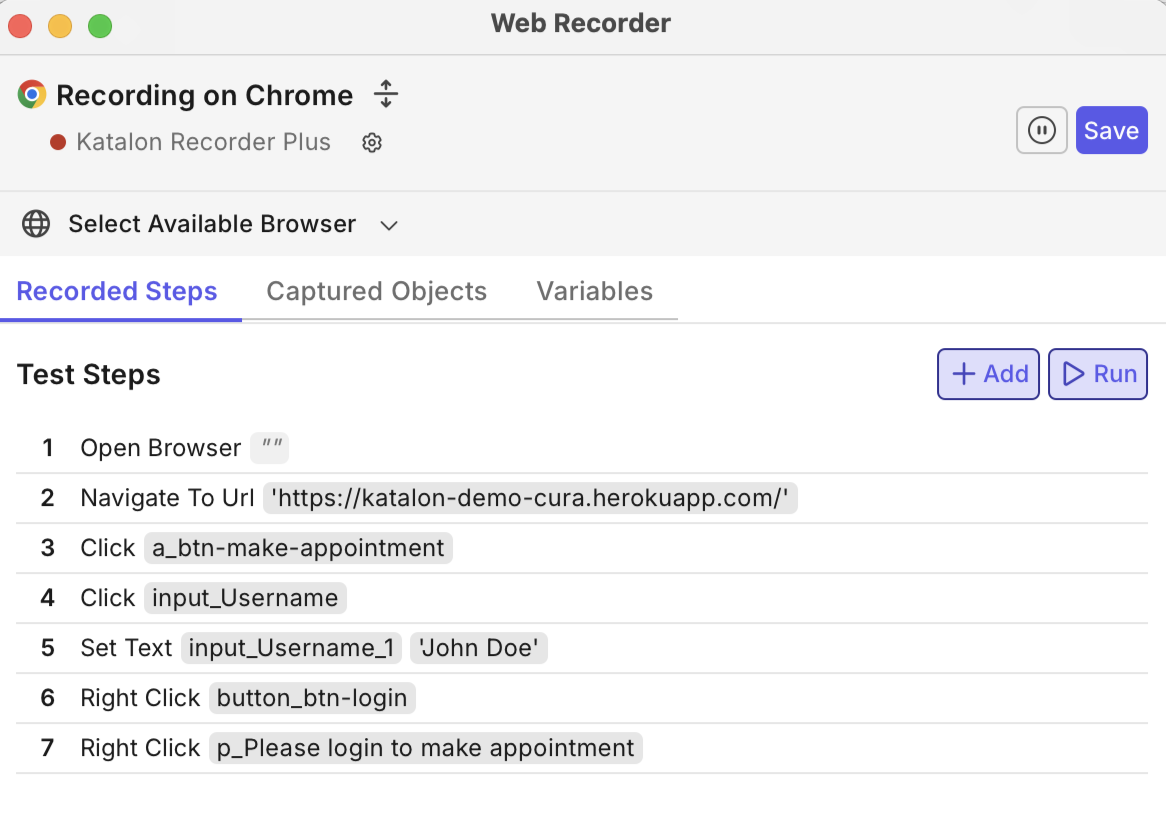
Recorded Steps lists each action as a test step. Click Add to add a step manually, or Run to replay the steps.
-
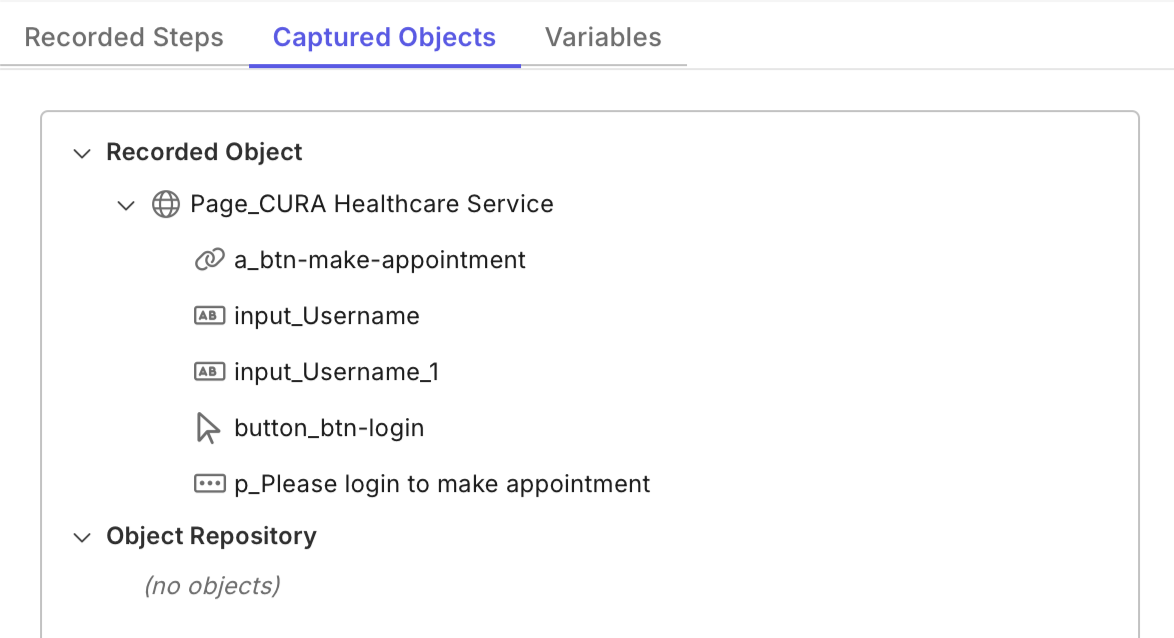
Captured Objects lists the objects captured on each page.
-
-
Click Save to stop recording and save the test. Create a new folder or select an existing one in the Object Repository for the captured objects, then click OK.

-
When prompted, name the new test case. Here, we name it TC1_Verify Successful Login, then click OK.
Katalon Studio opens the test case editor with your new test case. You can view the recorded actions and objects as test steps in the Manual view.

Put AI to work
Recording is one way to build tests. You can also let AI do it for you. Describe what you want to test in plain language, and Katalon AI Assistant handles the rest: it creates the test case and test objects, adds them to a test suite, runs the test, reports the result, and helps you fix the test if it fails.
-
On the main toolbar, click the Katalon AI Assistant icon to open the chat.
-
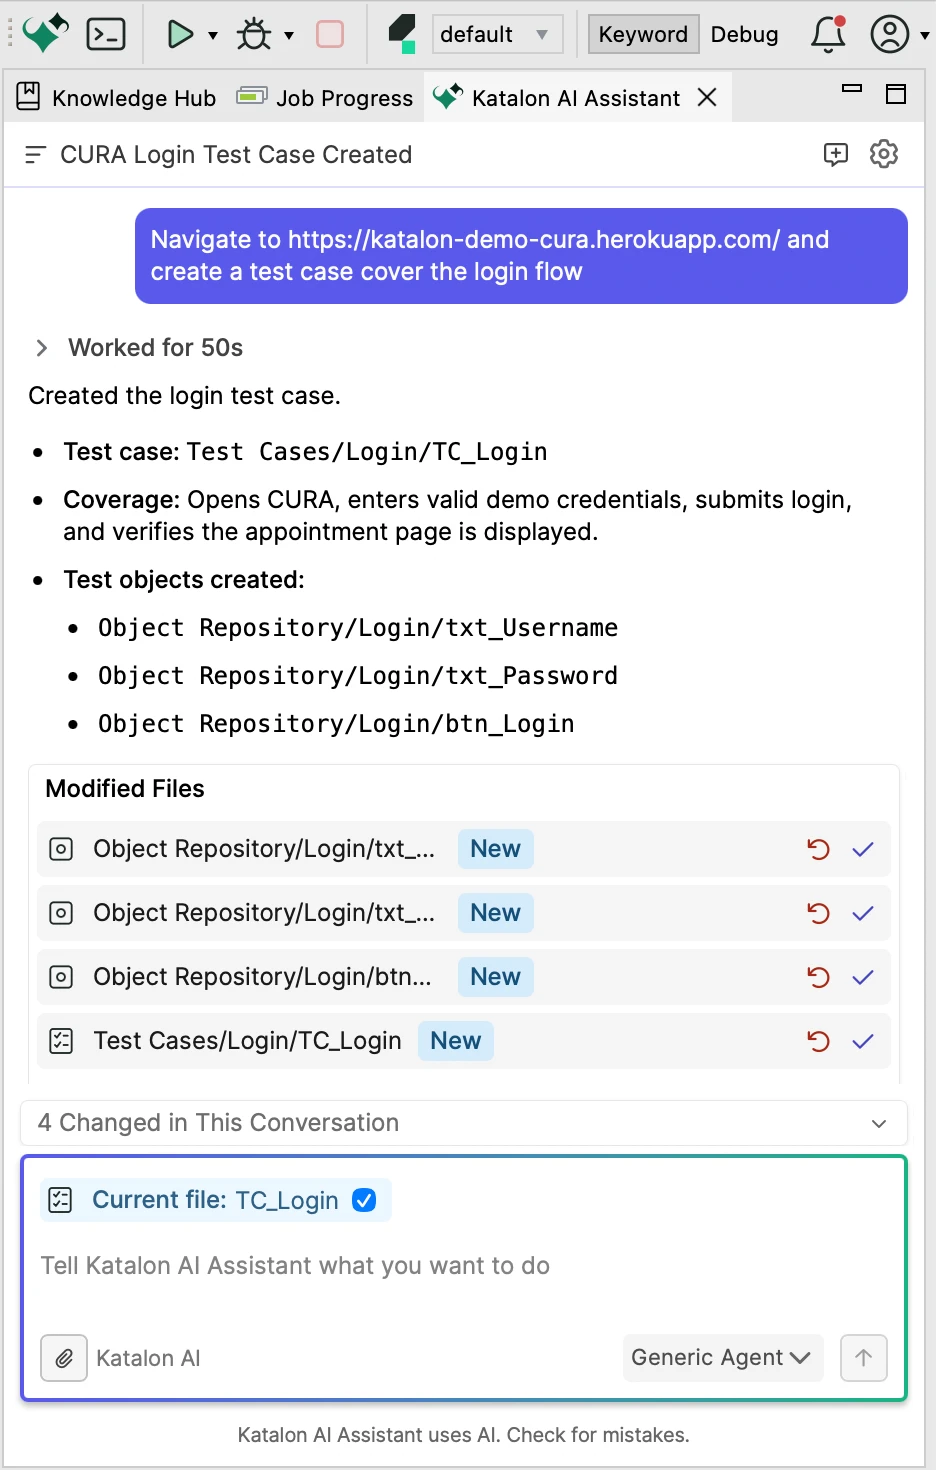
Tell the agent what to test. For example:
Navigate to https://katalon-demo-cura.herokuapp.com/ and create a test case that covers the login flow -
Review the result. The agent summarizes what it created and lists every new or changed file under Modified Files. For each file, keep the change or undo it.
-
Keep chatting to go further, for example, "add this test case to a test suite and run it" or "fix the failed step".
Click here to learn more
- Katalon AI Assistant overview
- Katalon AI Assistant Agent mode: let the agent create, run, and fix tests for you.
- Connect to Katalon Studio MCP Server: work with your Katalon Studio project from your own AI assistant, such as Claude, Codex, Copilot, or Cursor.
Plan your tests with a test suite
A test suite groups related test cases by testing objective. To create and run one in a local browser:
-
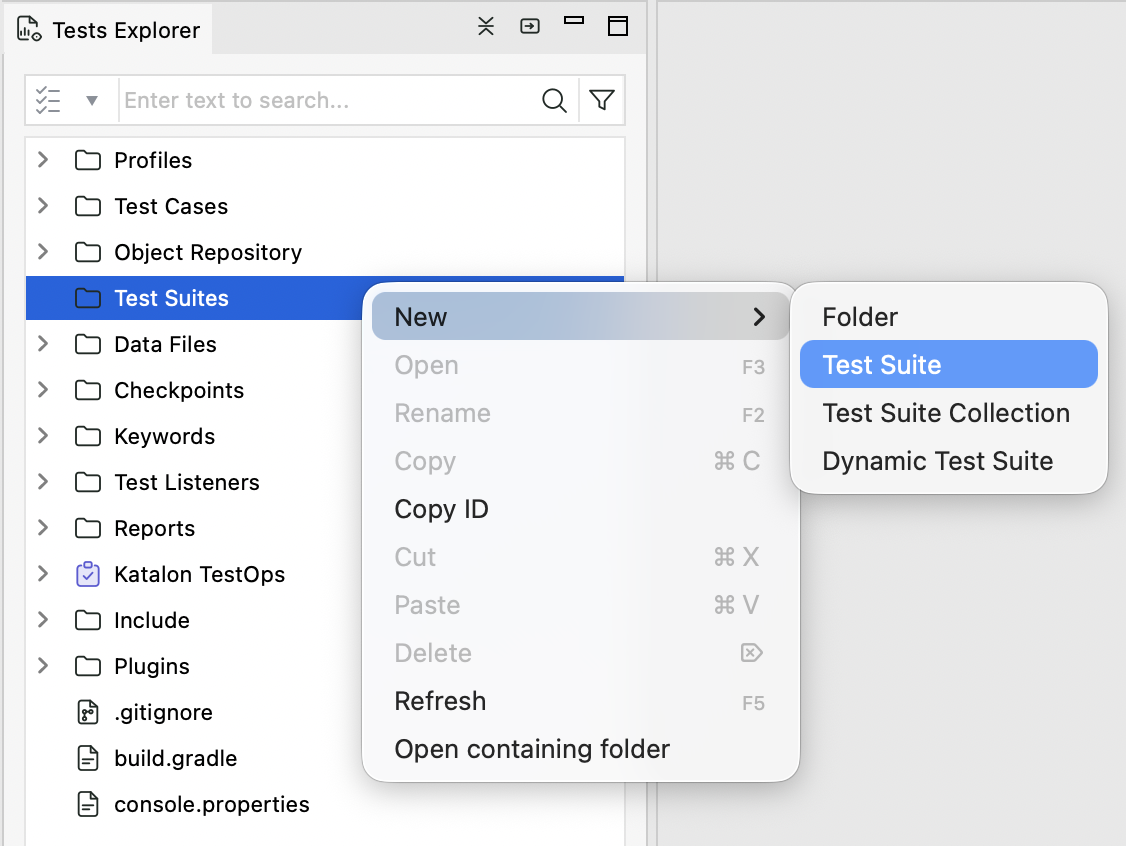
In Tests Explorer, right-click Test Suites, then select New > Test Suite.
-
Enter a name, such as TS-healthcare-tests, in the New Test Suite dialog, then click OK. Katalon Studio opens the test suite editor.

-
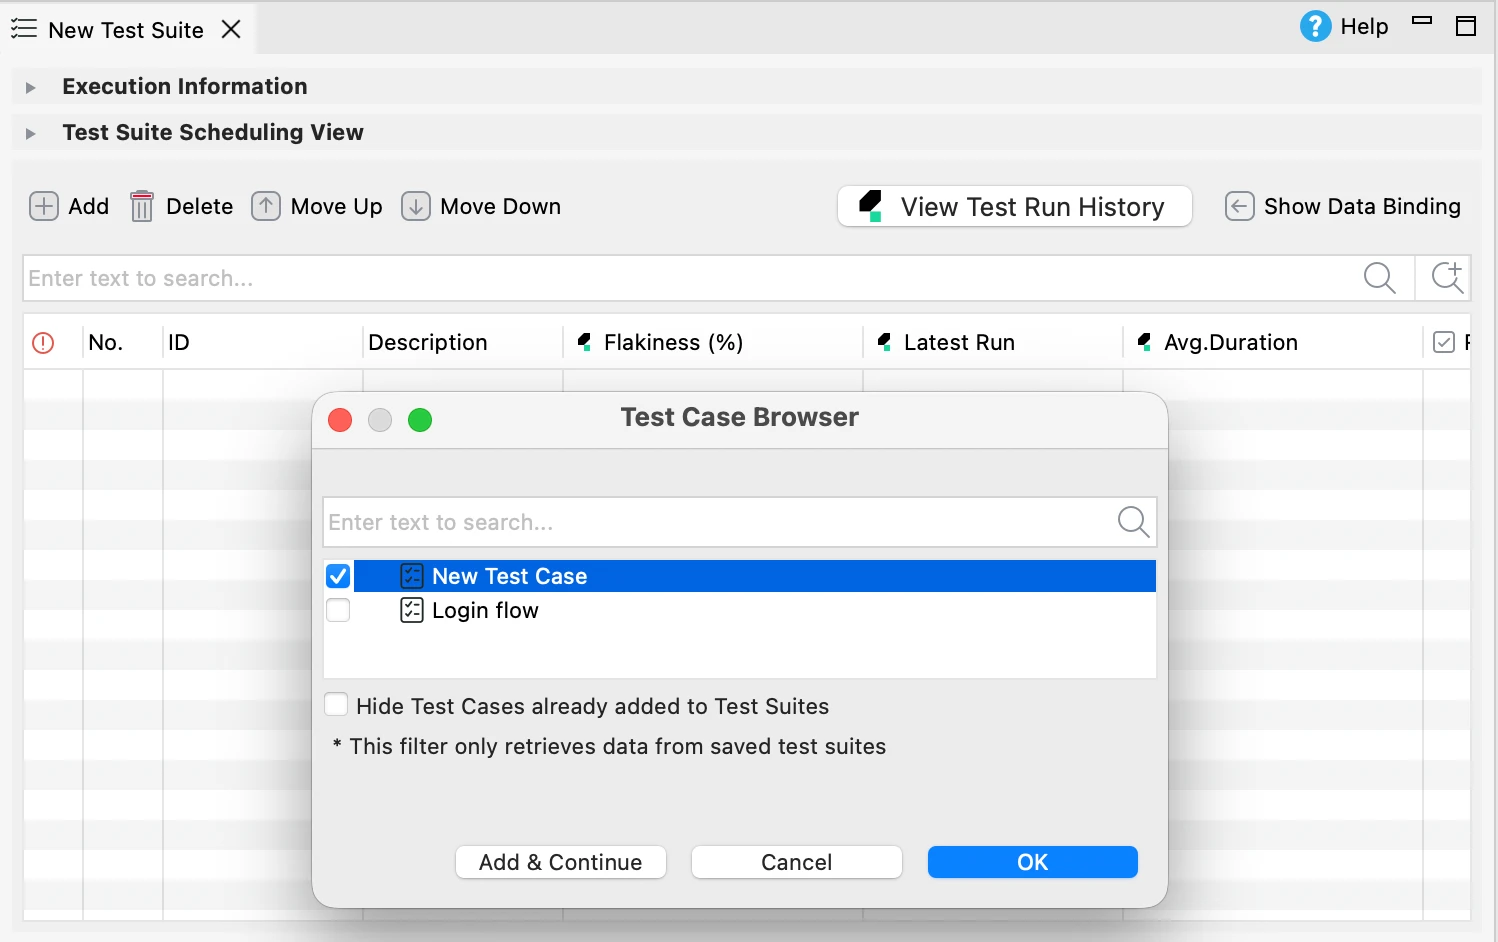
In the test suite editor, click Add to open the Test Case Browser.
-
Select the test case to add, then click OK. To add cases from several folders, click Add & Continue after each selection. The Hide Test Cases already added to Test Suites filter checks saved test suites only.
-
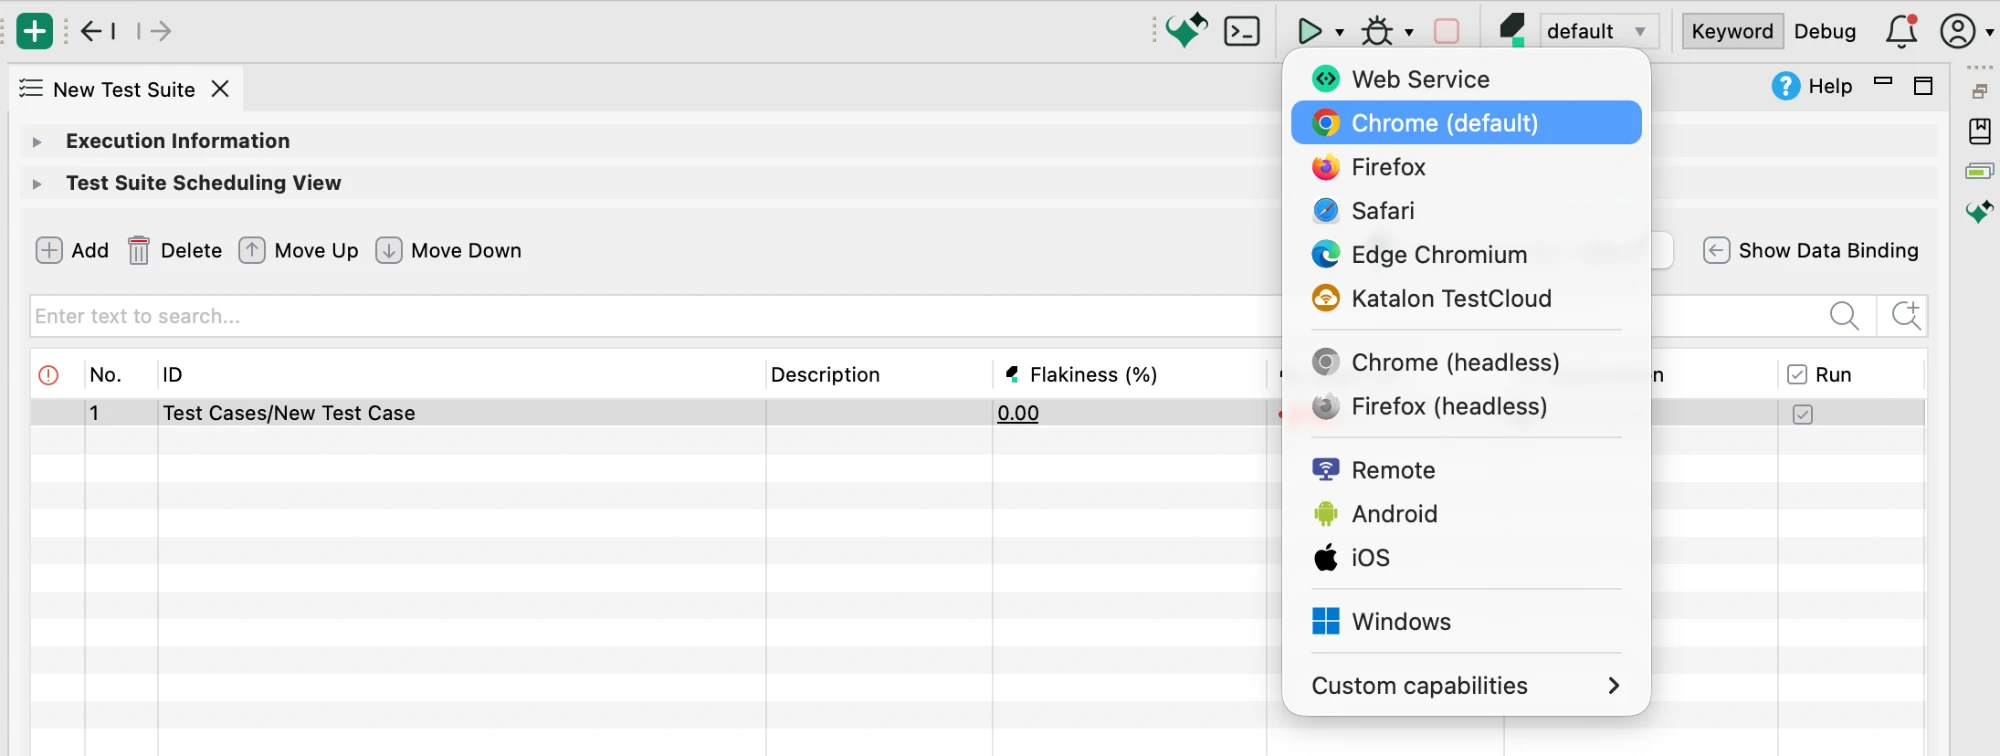
On the main toolbar, click Run to run the suite in Chrome (default). To choose another browser, open the Run dropdown.
-
Watch the test run. A browser opens and replays the steps. In Katalon Studio, follow the run in:
- Job Progress: Shows each run's status, browser, start time, and execution stages. If the project is connected to Katalon TestOps, click View on Katalon TestOps to open the uploaded result.
- Log Viewer: Shows the number of passed, failed, error, incomplete, and skipped test cases. Select a case to see its status, duration, and test steps.
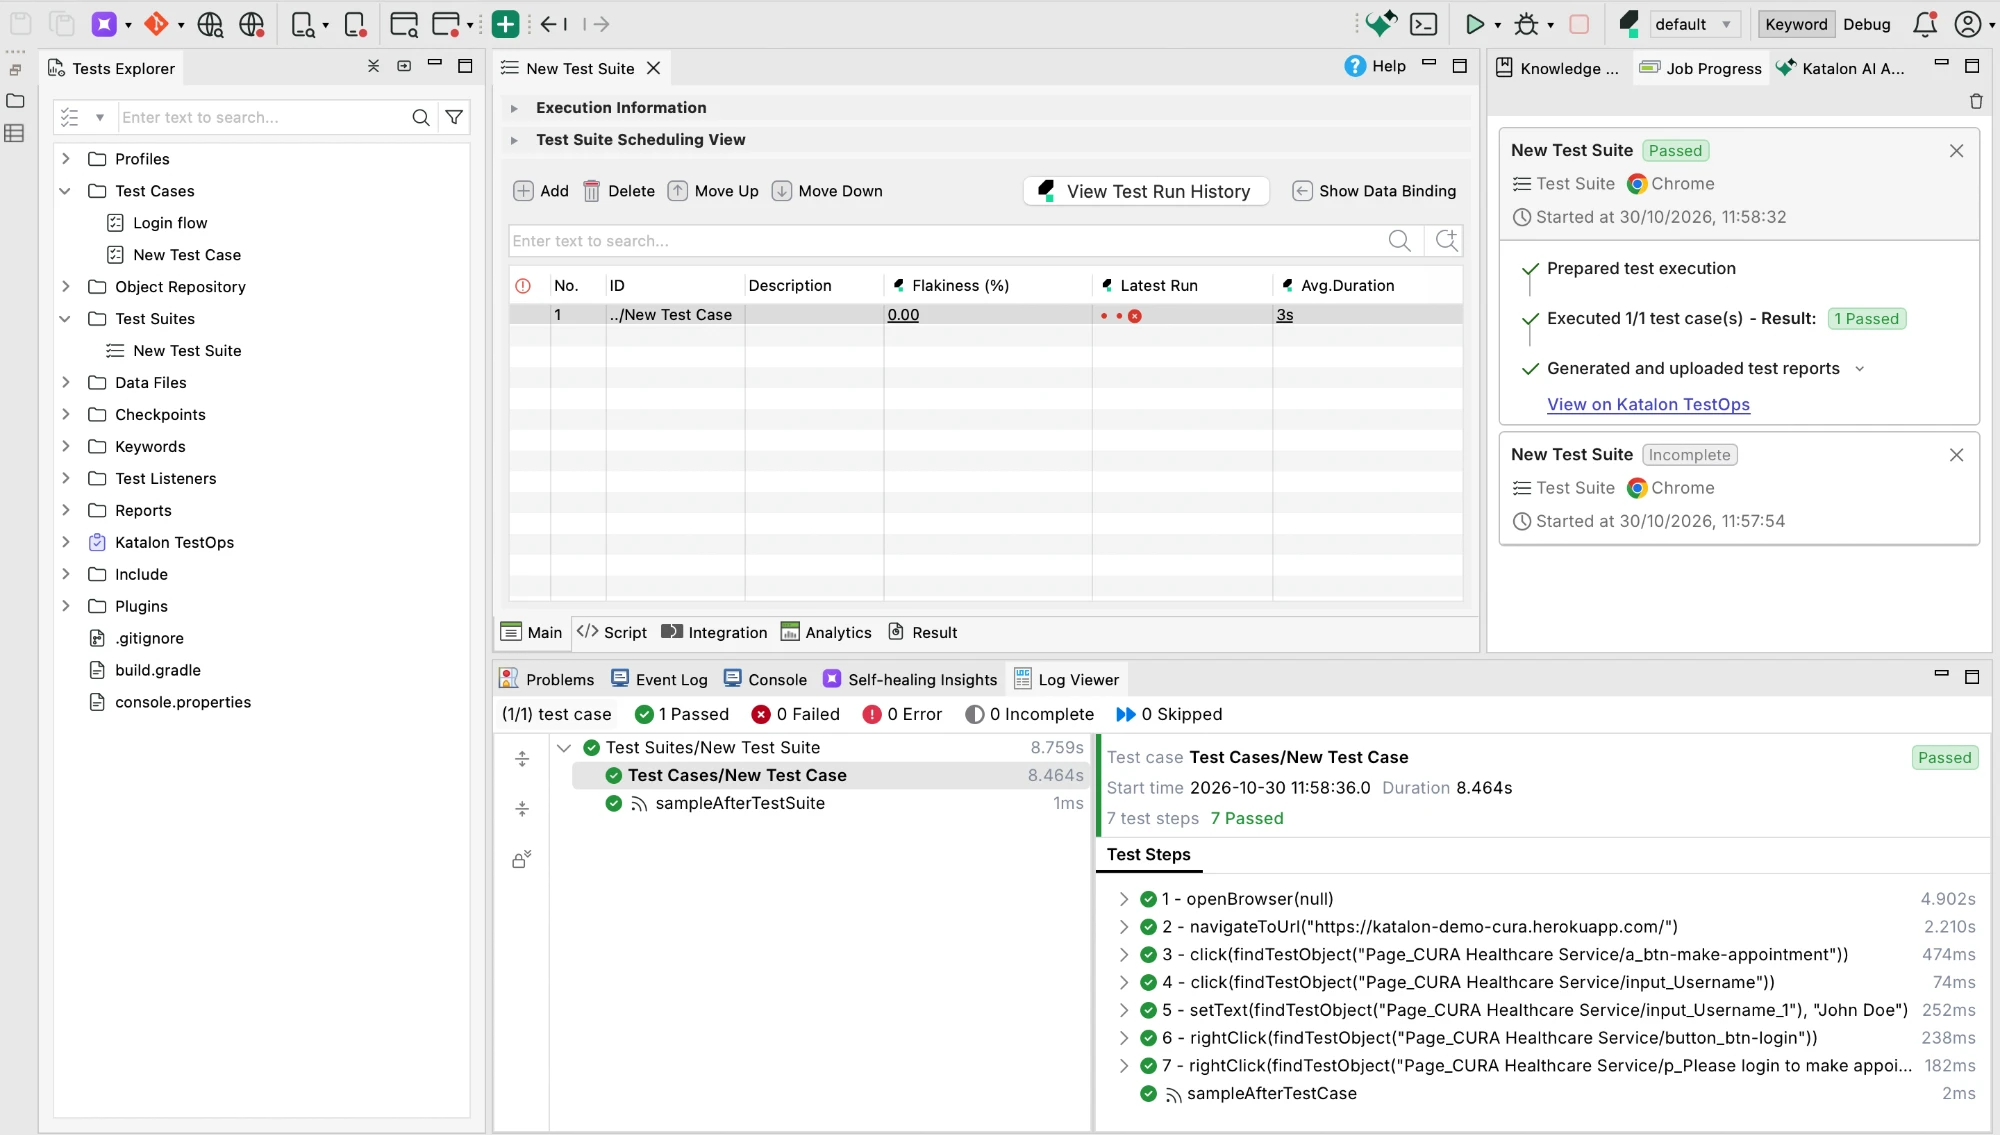
You have run your first test in Katalon Studio with a local browser. When the run finishes, Katalon Studio generates test reports automatically.
You can also run the suite with Katalon Runtime Engine from the command line or with Katalon TestCloud on cloud browsers and operating systems.
Analyze your test activities with Cloud Platform
When your project is connected to Katalon TestOps, Katalon Studio uploads each test suite report automatically after the run. In TestOps, you get detailed reports with logs, screenshots, and history, and you can share them with your team. To connect your project, see Integrate Katalon TestOps and TestCloud with Katalon Studio.
To view a report in TestOps:
- After a test suite run finishes, open the Job Progress tab.
- On the card for the run, check that Generated and uploaded test reports is complete.
- Click View on Katalon TestOps.
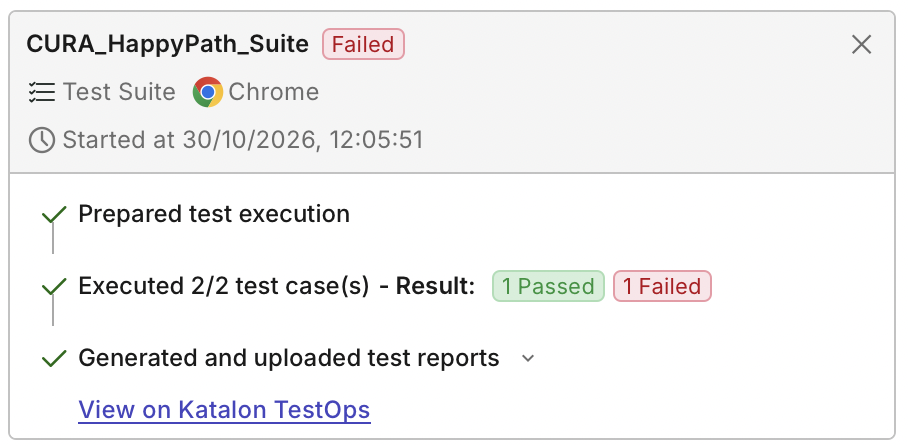
The report opens in Katalon TestOps.
Try cross-browser cloud testing
Requirements: You have a Katalon TestCloud subscription or trial.
Katalon TestCloud runs your tests on standard browsers, operating systems, and mobile devices in the cloud, so you don't need to set up your own test infrastructure. With the 30-day trial, you can run cross-browser tests in the cloud.
-
Go to Project > Settings > Katalon TestOps Integration. Make sure Enable Katalon TestOps Integration and Enable Katalon TestCloud Integration are selected.
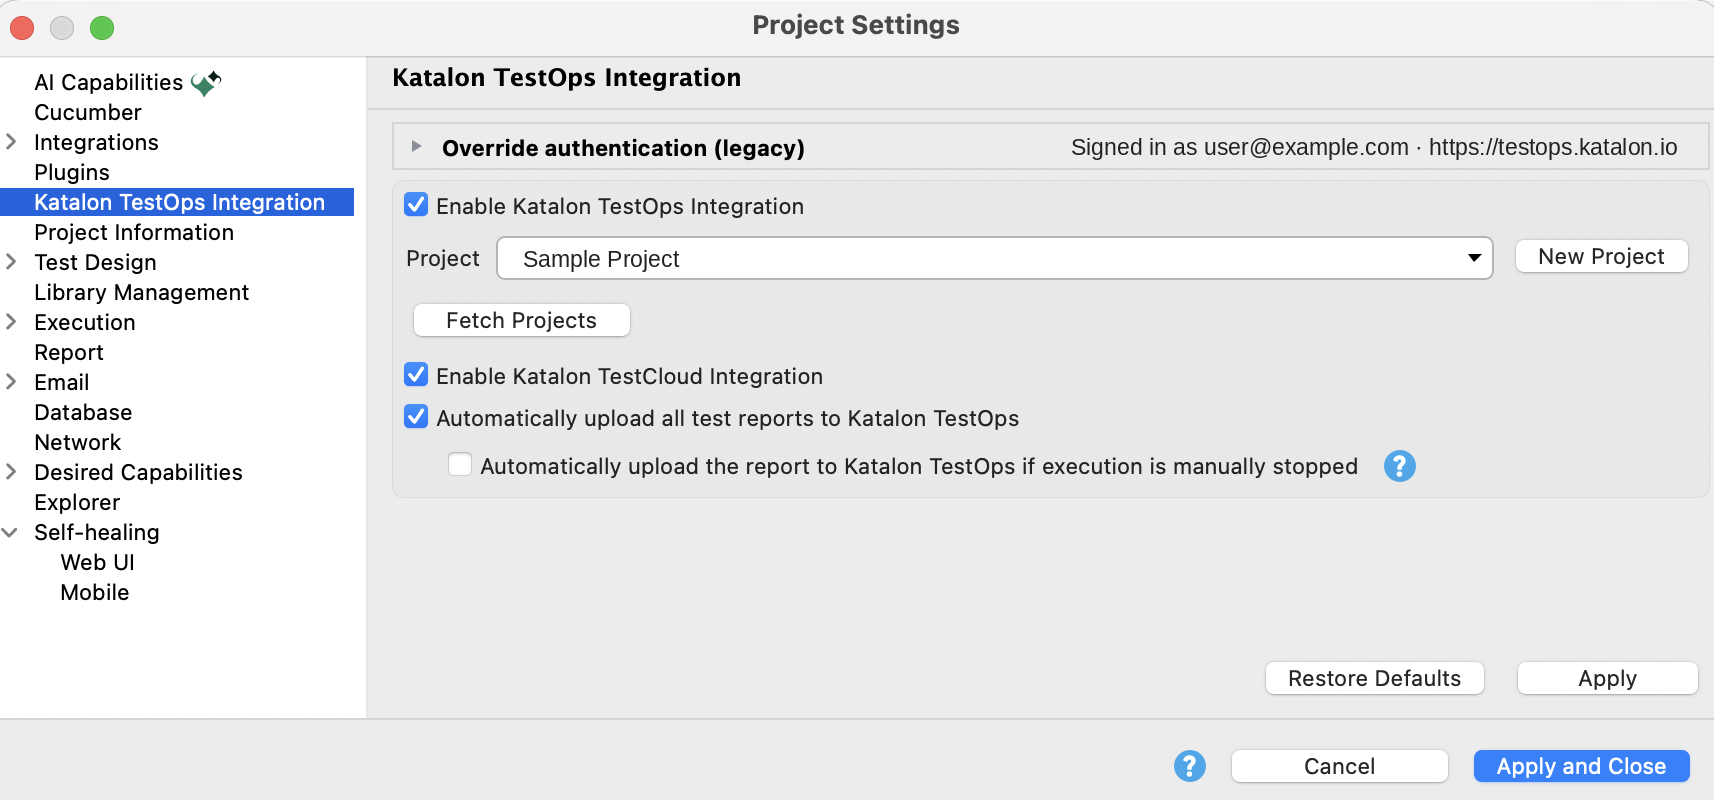
-
Open a test suite.
-
On the main toolbar, click the dropdown arrow next to Run and select Katalon TestCloud.
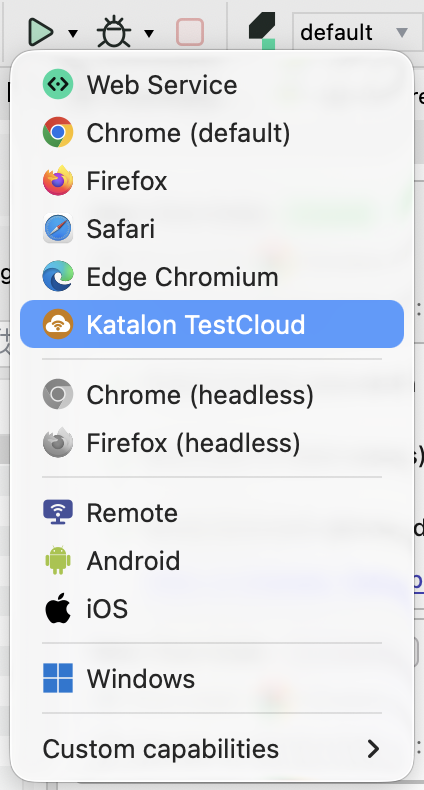
-
In the Katalon TestCloud Configuration dialog, under Environment, select Desktop Browsers. Then choose the operating system, browser, and browser version.
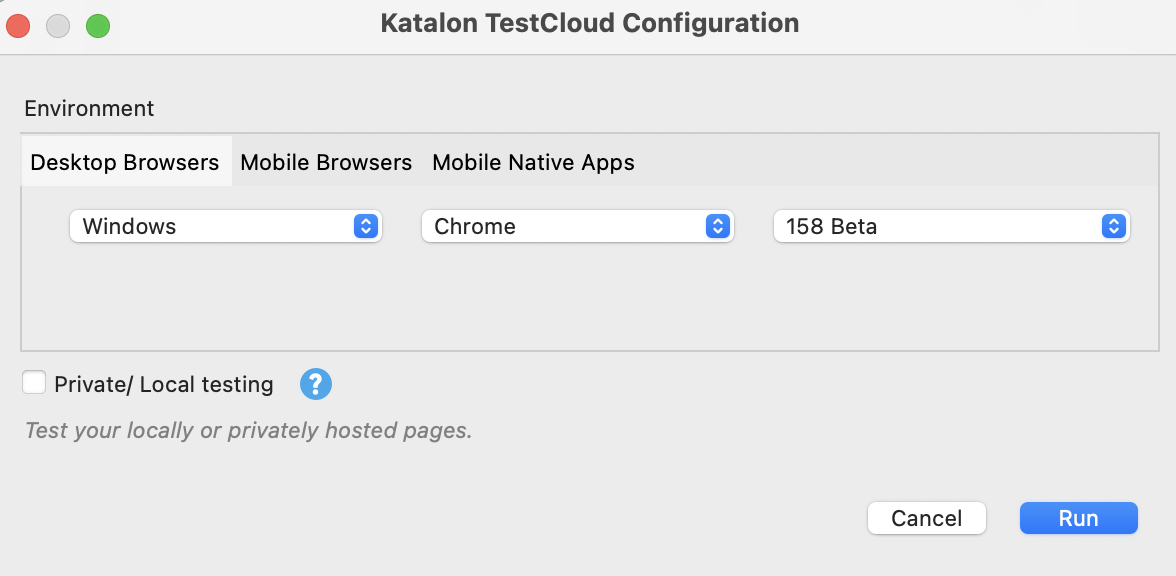
You can also run on Mobile Browsers or Mobile Native Apps. To test pages that are only reachable from your machine or private network, select Private/ Local testing. See Local testing with TestCloud in Katalon Studio.
-
Click Run to start the test run on TestCloud.
Execute test via CI/CD pipeline with Katalon Runtime Engine
- You have a Katalon Runtime Engine license or trial.
- You have downloaded and set up Katalon Runtime Engine. See Download Katalon Runtime Engine.
Katalon Runtime Engine is a test execution add-on for Katalon Studio. With its 30-day trial, you can execute automated tests in command-line mode and integrate them with a CI/CD pipeline. To generate and use a command for test execution:
- Open a terminal and navigate to the Katalon Runtime Engine folder that contains
katalonc.exeon Windows orkataloncon macOS and Linux.
On macOS, the executable is in the application's
Contents/MacOSfolder.
-
In Katalon Studio, click the Command Builder icon (the terminal icon) on the main toolbar.

-
In the Generate Command for Console Mode dialog, select a test suite and configure the execution:

- Executive Platform > Run with: Click Edit and select an environment.
- Authentication: The Katalon API key is auto-filled.
-
Click Generate Command. The Generated Command dialog opens.
-
Copy the generated command and paste it into your terminal to run the test suite.
You have generated and used a Katalon Runtime Engine command to execute a test suite. Katalon Runtime Engine also supports CI/CD pipelines, including GitLab, GitHub Actions, and Azure DevOps. See Supported CI/CD integrations.
Next steps
To explore more Katalon Studio and Katalon Platform capabilities, see: